A few years ago the term IoT was coined. In short, IoT – Internet of Things – stands for the interconnectivity of all kinds of devices. Devices with sensors that send their information to other devices, or computers, in order to be able to react to what the sensor got triggered. SAP introduced their Leonardo solution in order to handle the complexities and vast amounts of data that is introduced when using IoT solutions, and to analyse the data and retrieve insights from the collected data. A very good introduction into IoT & SAP’s Leonardo can be found on SAP’s educational platform, here: Touch IoT with SAP Leonardo. Somehow, these sensors got my interest, more than the “one platform to rule them all”. In this blog I would like to share my first steps into the wonderful world of sensors and the Arduino’s that control them.
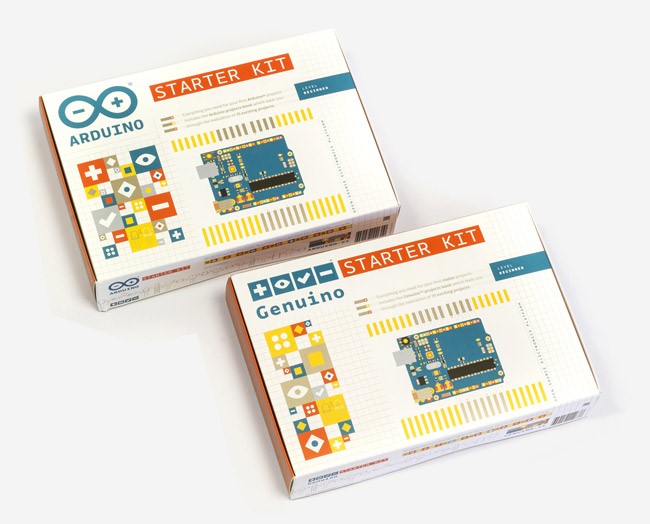
So, you know about IoT and Leonardo, but want to get started with sensors? I started with this excellent starterkit from Arduino itself:

You’ll learn the basics step-by-step, creating funny little projects, and get a nice introduction into the programming environment (called the Arduino IDE). Right now I’ve mentioned Arduino several times, but what is Arduino? On the website is listed: ‘Arduino is an open-source electronics platform based on easy-to-use hardware and software”, and that sums it up. It is a microprocessor with several analog and digital ports. You can attach several sensors or other micro-electronics and program them. The Arduino is programmed in a language that resembles C. What I had to get used to, is that the Arduino is programmed inside a loop. There a two main methods, the setup() and the loop() method.
One of the first projects is to make a LED blink:
int LED = 3;     // initialize digital pin nr3 the pin where the LES is attached.

void setup() {
// initialize digital pin LED as an output.
pinMode(LED, OUTPUT);
}
// the loop function runs over and over again forever
void loop() {
digitalWrite(LED, HIGH); // turn the LED on (HIGH is the voltage level)
delay(1000); // wait for a second
digitalWrite(LED, LOW); // turn the LED off by making the voltage LOW
delay(1000); // wait for a second
}
As you can see, two main methods, and everything that needs to be done is executed ad infinitum.
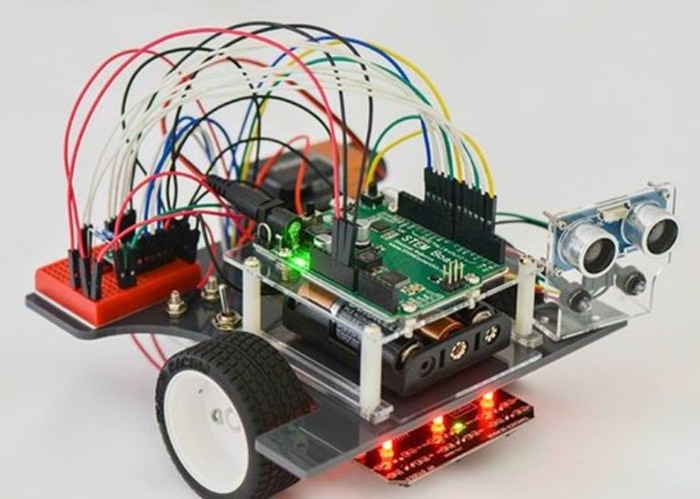
After a while of playing around, your kids get curious. And then the fun more than doubles! Making projects together with your children is time spent well. I got this Pi-Bot Kickstarter project:

This is basically a small explorer with loads of sensors. The fun part is that it is developed as an instruction set for children by the STEM center USA (STEM stands for Science + Technology + Engineering + Math). This means that the instructions are very detailed and step-by-step, and accompanied by some video’s. The instructions led you build the basic board with wheels and Arduino, and lets you ride it quite quickly. After that, sensors are added one by one, and with each sensor you can play around. The sensor included are an ultrasound distance sensor and a reflection sensor. The reflection sensor lets the Pi-Bot follow a line (see clip). How cool is that to build as a 10-year old girl?
Also included is a buzzer; but I replaced that with a audiodecoder (more on that in a moment). You can still buy these Pi-Bot’s, here.
My next project was for my other hobby; I like to do improvisation theatre, and related to that, LARP. I am a volunteer for children’s LARP in the Netherlands (https://www.subcultures.nl/reallifegames/ ). I created a small device to be used in the horror / scary setting aimed at teenagers (teaser video) . For this event we were able to use an abandoned military area with shelters and bunkers. This device, a small black box, detects if someone was passing in a small dark corridor in one of the bunkers using ultrasound. If a person is detected, a sample from the Harry Potter movie was played. If within 3 minutes another person was detected, another (random) sample was played. By hiding the speakers at a place the teenagers just passed, most of them thought they were followed, But we made it sure the path at the beginning of the bunker was difficult, and if someone passed, a lot of noise was generated. You can imagine the teenagers reaction by hearing these sounds just behind them.

The box was a 1 euro box, painted black. The lock and hinges were taped with black ducktape. You can see the wires for the speaker getting out on the picture. The ultrasound sensor was fitted in the lid. The Arduino is in the right corner, next to the audiodecoder. The audiodecoder in its turn feeds the amplifier, in the lower right corner of the box. The MP3’s were stored on a MicroSD card. For clarity I removed the power connection in the pictures. I used the micro-USB port on the Arduino to feed it all.
The future should yield two more projects, and I am waiting on one Kickstarter project to be delivered, the Spirit Rover.

This Kickstarter project looks a bit like the Pi-Bot, but includes a Raspberry-Pi next to an Arduino. This one should give me some nice quality time building it with my son, while I am learning more about the communication between Arduino & Raspberry, as well as wireless connectivity. Cool stuff!
One current project is a box in which I can put all the mobile phones in the house during dinner (yes, that includes mine as well). I am experimenting with gears and levers for closing the box versus a solenoid. Just the box is boring, so I am putting an LCD display counting down the time before the box opens. Perhaps I’ll create an interface for bypassing the lock, making it also a nice puzzle for my LARP hobby.
Then my last project, which is currently only in the design phase, is an Ouija-board, controlled by magnets. This project is inspired by my LARP hobby as well. I’ve already dismantled two printers for their steel guiding rods and motor, and I got some nice neodymium magnets. This project should involve some 3D printing; the ruler for the guiding rods will be 3d printed. Power is an issue here is well, the Arduino is not capable of delivering enough power to the motors driving the magnet. And the final issue, one I have no idea yet of how to solve this, is knowing the current position of the pointer on the Ouija-board.
So, what started as just a curious look into what this IoT stuff was, developed to a new full-blown hobby. Making things is so cool! And the limit is just your idea (and time to realize it). I’ve already been thinking about spreading scents into a room, depending on sensors (did I mention I used to study chemistry?) and combining this with light and sound. So many things to try!
